
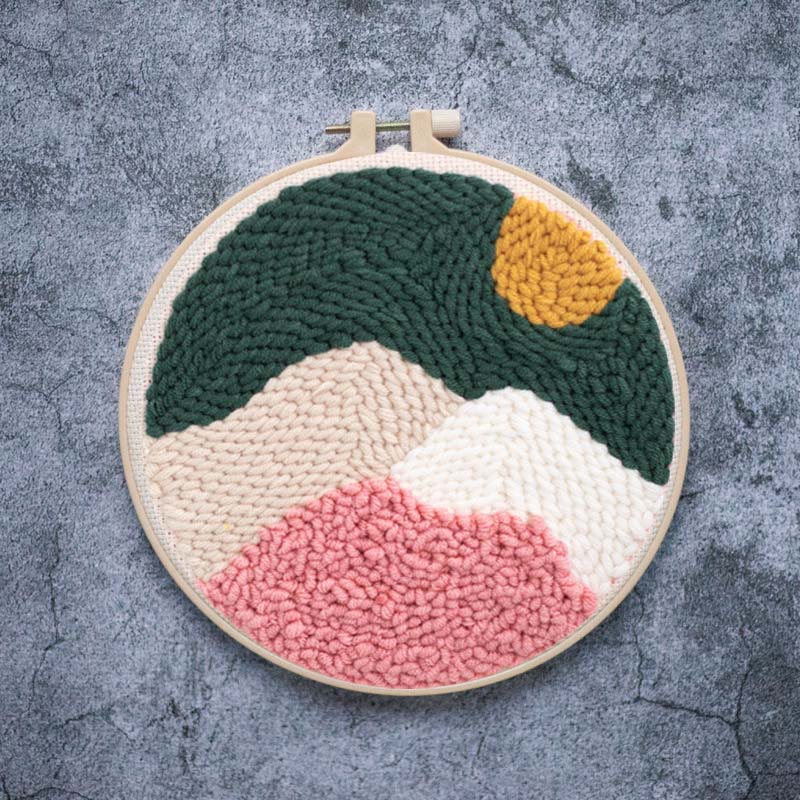
A punch needle landscape looks best when you punch the outlines of each color block first, then fill inside them with rows of even loops. Retro designs use a few bold colors, so clean edges and consistent loop height matter more than fine detail. These tips also help with kits that have sunsets, hills, deserts and starry skies.
Why retro landscapes suit punch needle
Punch needle fills space fast, and retro landscapes are made of big simple shapes: a sun, layered hills, stripes of sky. Large blocks of one color show off the soft texture of loops. There is little fine detail to go wrong, which is why we suggest them as a first project in our punch needle for beginners guide.
Plan your colors before you punch
Look at the whole design and decide the order. Work one color at a time, so you only change yarn between areas.
- Punch the sky or farthest layer first, then move toward the foreground. The nearest shapes then sit on top visually.
- Keep warm and cool colors in separate blocks. A retro palette comes from strong contrast between neighboring bands.
- Punch the smallest areas of a color while you have that yarn threaded, such as a sun, star or small hill, before switching.
- Punch right up to the edge of each block, but do not cross into the next color’s area. Crossing the line blurs the boundary.
Your kit supplies the yarn, so you do not need to pick shades. The order you use them in is what changes the result. For mountain scenes in embroidery instead, see our post on mountain embroidery.
Step by step: punching a landscape
- Hoop the fabric drum-tight. Our guide to using an embroidery hoop shows how, and a tight hoop stops loops pulling out.
- Thread the tool as shown in your kit’s tutorial, and punch a few test loops in a spare corner if there is room.
- Choose your first color and punch its outline first. A single line of loops along each edge makes a clear boundary.
- Fill the inside of the shape with rows worked close together, all in the same direction.
- Keep your needle low as you travel between stitches, and push it to the same depth each time.
- Trim the yarn tail short on the back and start the next color.
- When every color block is filled, check for gaps and patch them with a few extra stitches.
Loop tips for hills and skies
Row direction shows. Punch skies in horizontal rows and hills in rows that follow the curve of the hill, and the finished piece will look more natural. Change direction between color blocks so the loops catch the light differently and the edges stay sharp.
Aim for one loop height across the whole piece. Uneven loops show most in big single-color areas. If you get stuck, our punch needle problems and fixes post explains gaps, uneven loops and loops pulling out.
Retro landscape kits
The Retro Sun & Hills Punch Needle Kit for Beginners has retro sunsets, hills, desert and starry skies. It includes printed cotton fabric, yarn, a punch needle pen tool set, a hoop and an English illustrated tutorial. The finished size is about 20 cm (8 in), and it is rated beginner.
The Retro Landscape Punch Needle Kit with Punch Pen has layered hills, mountains, a sunset sea and a rainy night in a muted palette. It includes the printed cloth, yarn, a punch needle pen and a 20 cm (8 in) imitation-bamboo hoop. It is also rated beginner.
The Starry Night & Sunset Punch Needle Kit has a sunrise, dusky hills, a starry night sky and a moonlit sea, plus a few art-inspired portraits. The supplier rates it beginner to advanced beginner, since the portraits have more color changes.
See all of them in our punch needle kits collection. For night-sky ideas in other crafts, read our celestial embroidery post.
FAQ
What is the best punch needle project for a beginner?
A design with big color blocks and few color changes, such as a retro landscape. The fewer the details, the easier it is to keep loops even.
Which order should I punch a landscape in?
Outline each color block, fill it, and work from the sky toward the foreground.
How do I get sharp edges between two colors?
Punch the outline of each shape first, then fill inside it with rows that stop at the outline.
How long does a punch needle landscape take?
It varies. Punch needle fills quickly, and one of our kits describes a design as a good weekend project. See how long does embroidery take for how to estimate your own pace.