
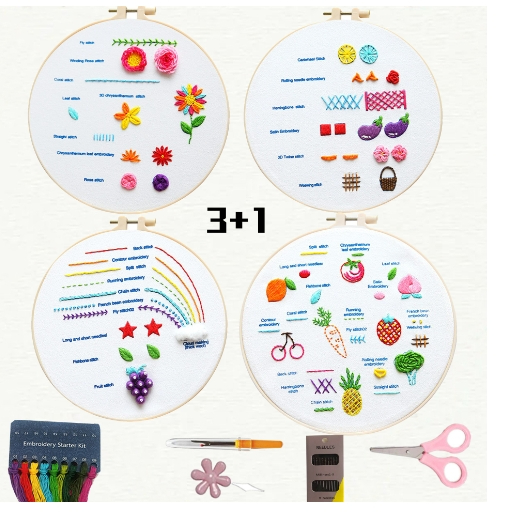
Cross stitch is made of one simple stitch: a small X. Put enough of them side by side and they build a picture, almost like pixels. Because there’s really only one stitch to learn, cross stitch is one of the most beginner-friendly needle crafts there is.
The first choice you’ll face is whether to start with stamped or counted cross stitch. This guide explains the difference, helps you choose, and walks you through your first stitches.
Is counted cross stitch hard?
No. Counted cross stitch is easy to learn, but it asks for more concentration than stamped cross stitch. The stitch itself is still one X; the extra work is counting squares on a chart and matching them to holes in blank fabric. Beginners usually find 14-count Aida easiest because the grid is large and clear.
If you can count carefully, check your place every few stitches and keep every top leg of the X leaning the same direction, counted cross stitch is very manageable for a first needlecraft.
How to do counted cross stitch: 6 beginner steps
- Start with 14-count Aida, a blunt tapestry needle and two strands of embroidery floss.
- Fold the fabric in half both ways to find the center, then find the center of your chart.
- Thread the first color shown near the center and secure it with a loop start or a short tail under your first stitches.
- Follow the chart one square at a time, making the first diagonal of each X in the same direction.
- Cross the Xs with the second diagonal, again keeping every top stitch consistent.
- Check your count often. When a thread ends, run it under four or five stitches on the back and trim it.
That is the whole basic process. The sections below explain charts, stitch direction, starts and finishes in more detail.
Stamped vs counted cross stitch
Stamped cross stitch
In stamped cross stitch, the design is printed directly on the fabric. You simply stitch an X over each printed mark, in the color shown.
Why beginners like it:
- No counting and no chart to follow while you stitch
- You can see the whole picture from the start
- Easy to pick up and put down
Things to know:
- Stamped kits are often printed on plain cotton or a cotton blend rather than a counted grid fabric, so it can take a little care to keep your Xs the same size.
- The printed marks should be covered completely by your stitches. Many kits use ink meant to wash out after stitching; check your kit’s instructions before washing.
Counted cross stitch
In counted cross stitch, the fabric is blank. You follow a separate chart, a grid of symbols, where each square equals one stitch. You count squares on the chart and holes on the fabric to place every X.
Why stitchers love it:
- Crisp, even stitches, because the fabric has a built-in grid
- A huge choice of patterns
- You can stitch any design, even your own
Things to know:
- It takes more concentration at first, especially counting.
- A counting mistake can shift part of the design, so you’ll learn to check often.
Which should you choose?
If you want to relax and see results quickly, start with stamped. If you enjoy puzzles and precision, or already know you’ll love cross stitch, jump straight to counted. Plenty of people start with a stamped kit and move on to counted once they’re comfortable with the X itself. If you are still deciding which craft fits you, our cross stitch vs embroidery vs punch needle comparison shows the setup, speed and learning curve side by side.
We don’t sell cross stitch kits at the moment. If you like the idea of a design printed right on the fabric, our beginner embroidery kits work the same way, with free-form stitches instead of Xs.
What you need for cross stitch
- Fabric. For counted work, the classic beginner fabric is 14-count Aida: a cotton fabric woven into clear squares with holes at each corner. “14-count” means 14 squares per inch. Stamped kits come with printed fabric.
- Stranded embroidery floss. Six-strand cotton floss, separated into the number of strands your pattern asks for. Two strands is typical on 14-count Aida.
- A tapestry needle. It has a blunt tip that slips through Aida holes without splitting the threads. Sizes 24 or 26 are common for 14-count.
- A hoop or frame. Keeps fabric flat and even. It doesn’t need to be as tight as for embroidery.
- Small scissors.
- Optional: a floss organizer with bobbins, which becomes very handy on designs with many colors.
How to read a cross stitch chart (counted)
A chart is a grid. Each square is one stitch on your fabric.
- Symbols or colors in a square tell you which floss color to use. The key (legend) matches each symbol to a floss color number.
- Empty squares mean no stitch; the fabric shows through.
- Bold lines every 10 squares make counting easier. Count in tens, not ones.
- Arrows on the edges mark the center of the design.
- Solid lines drawn across squares usually mean back stitch outlines, added at the end.
- Half-squares or small symbols in corners mean fractional stitches (quarter or three-quarter stitches). Leave these for later projects if you’re just starting.
Where to start stitching
For counted cross stitch, start in the center so the design ends up centered on your fabric:
- Fold the fabric in half one way, then in half the other way. The point where the folds cross is the center.
- Find the center of the chart using the arrows.
- Start stitching the color nearest the center, and work outward.
For stamped cross stitch, you can start anywhere, but starting near the middle and working out keeps the fabric easier to handle.
How to make a cross stitch
A cross stitch is two diagonal stitches crossing in the middle of a square.
- Come up at the bottom-left corner of a square.
- Go down at the top-right corner. That’s your first half, “/”.
- Come up at the bottom-right corner.
- Go down at the top-left corner. That completes the X.
The one rule that makes it look neat
All your top stitches should lean the same way. If the top stitch goes from bottom-right to top-left on one X, do it the same on every X in the piece. Mixed directions catch the light differently and look messy. Consistent direction is what gives cross stitch its smooth, even look.
Two methods: English and Danish
- English method: complete each X before moving to the next. Good for single stitches, scattered areas and diagonals.
- Danish method: stitch a row of half stitches (“////”) in one direction, then come back along the row to cross them (“XXXX”). Faster for rows and blocks of one color, and uses a little less floss.
Try both and use whichever feels natural. Many stitchers switch depending on the area.
Starting and ending threads without knots
Knots can make lumps under the fabric, so cross stitchers usually avoid them.
Loop start (for an even number of strands): if your pattern uses two strands, take one strand twice as long as usual and fold it in half. Thread the two cut ends through the needle, leaving the loop at the other end. Come up from the back, make your first half stitch, and on the back pass the needle through the loop. It locks in place with no knot.
Tail start: come up from the back, leaving a tail of about an inch behind the fabric. Hold it flat along the direction you’re stitching, and let your next few stitches cover and trap it.
Ending: on the back, slide the needle under four or five stitches, then trim the tail.
Back stitch outlines
Many patterns add a back stitch outline after the Xs are done. It sharpens details like eyes, lettering and edges. Back stitch in cross stitch follows the fabric holes: come up one hole ahead, go down one hole back, and repeat. You can learn more about it in our guide to embroidery stitches for beginners.
Common beginner mistakes
- Top stitches in different directions: pick one direction and stick to it.
- Pulling too tight: the fabric puckers and holes stretch. Let the floss lie flat.
- Twisted floss: let the needle dangle and spin free every so often.
- Carrying thread too far on the back: more than a few squares can show through. End and restart instead.
- Counting errors: count twice, stitch once. Stitching in blocks of 10 squares helps.
Finishing your cross stitch
- Wash if needed. If your kit’s printed ink or a pen needs to be removed, follow the kit’s washing instructions. Rinse gently in cool water, roll in a towel, and let it dry flat.
- Press face down on a fluffy towel with a warm iron so your stitches aren’t flattened.
- Display it. Put it back in a hoop and trim the extra fabric, frame it, or sew it onto a pillow or tote.
Cross stitch uses the same six-strand cotton floss as embroidery, so one good color range covers both. Our floss set comes in 50 or 200 colors.
FAQ
Is cross stitch easy for beginners?
Yes. There’s essentially one stitch to learn, the X, and you can finish a small design in a few sessions. Counted cross stitch is not hard, but the counting takes a little practice; stamped cross stitch removes that step by printing the design on the fabric.
How do you do counted cross stitch as a beginner?
Start in the center of 14-count Aida, follow the center of your chart, use two strands of floss, and stitch one X for each chart square. Keep every top leg of the X leaning the same way and check your count every few stitches.
How do you do stamped cross stitch?
Follow the printed marks on the fabric and cover each mark with an X in the indicated color. You do not count a separate chart, so stamped cross stitch is usually the simpler starting point for a complete beginner.
What is the difference between stamped and counted cross stitch?
Stamped cross stitch has the design printed on the fabric, so you stitch over it. Counted cross stitch uses blank fabric and a separate chart, and you count squares to place each stitch.
What does 14-count Aida mean?
It means the fabric has 14 squares (stitches) per inch. Higher numbers mean smaller squares and a smaller finished design. 14-count is the usual beginner choice.
How many strands of floss do I use for cross stitch?
Two strands on 14-count Aida is the common default. Follow your kit or chart if it says something different.
Do I need a hoop for cross stitch?
It’s not strictly required on stiff Aida, but a hoop or frame keeps the fabric flat and makes stitches more even, so most beginners find it helpful.
Which way should the top stitch go?
Either way is fine, as long as every top stitch in the piece goes the same direction.