
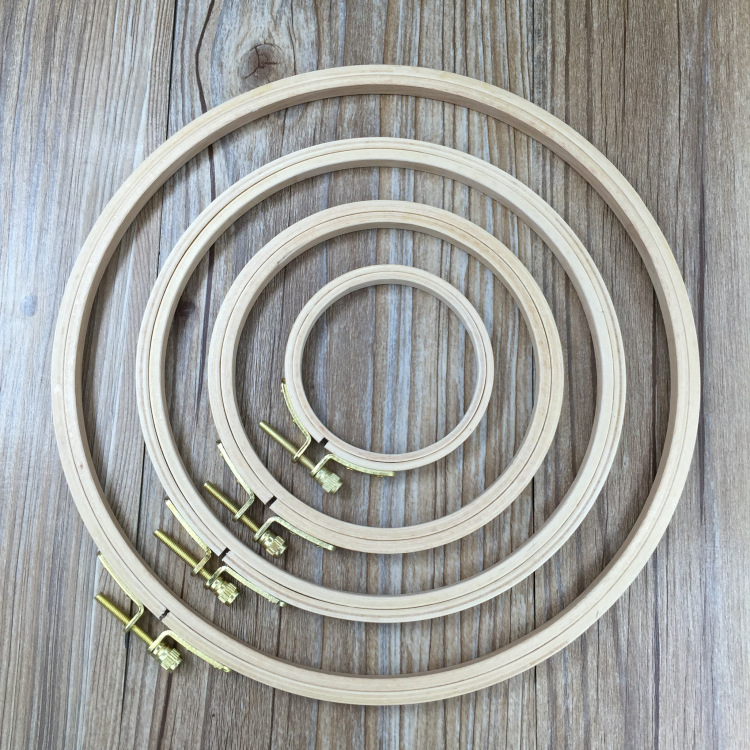
An embroidery hoop does one job: it holds your fabric tight while you stitch. That sounds minor, but it’s the difference between neat, even stitches and puckered fabric. This guide shows you how to hoop your fabric properly, which size to buy, which materials work best, and how to turn the hoop into a frame when you’re done.
What an embroidery hoop is
A hoop is two rings. The inner ring is solid. The outer ring has a gap and a screw (or a clamp) so you can loosen and tighten it. Your fabric is sandwiched between the two rings, and tightening the screw pulls it taut.
Tight fabric matters because:
- stitches stay the length you made them instead of pulling the fabric together,
- your needle goes exactly where you aim it,
- satin stitch lies flat instead of puckering,
- your hands get less tired, because you’re not fighting loose cloth.
How to put fabric in an embroidery hoop
- Loosen the screw on the outer ring until the two rings separate easily.
- Lay the inner ring on a flat table.
- Place your fabric on top, design side up and centered over the ring. Leave at least 1 to 2 inches of fabric around the ring on every side.
- Press the outer ring down over the fabric and inner ring. It should fit snugly; if it’s hard to press, loosen the screw a little more.
- Pull the fabric gently all the way around, a little at a time, like tightening a drum. Keep the design straight; the weave should run in straight lines, not bent curves.
- Tighten the screw. Tap the fabric with a finger. It should sound like a drum and feel firm, with no ripples.
Put the screw at the top (12 o’clock) if you’re right-handed so your thread doesn’t catch on it. Left-handed stitchers often prefer it slightly to one side.
Keeping it tight while you stitch
Fabric slowly loosens as you work, especially cotton and linen. Every so often, give the edges a gentle tug and re-tighten the screw. It takes five seconds and keeps your stitches even.
Which embroidery hoop size should you buy?
Hoops are measured by the inner diameter. The right size depends on your design and your hands.
- 4 inch: small motifs, patches, bookmarks-sized pieces and ornaments. Easy to hold, but little working room.
- 5 to 6 inch: the most comfortable size for most beginners. Fits in one hand, holds a nice-sized design, and is quick to finish. Great for a first project.
- 7 to 8 inch: larger designs, stitch samplers and punch needle. Gives more space, but some people find it tiring to hold for long sessions.
- 10 inch and up: big pieces. Often used with a stand so you don’t have to hold the weight.
Two rules of thumb:
- The whole design should fit inside the hoop with a little space around it, so you never have to stitch right next to the ring.
- If the design is bigger than your hoop, you can move the hoop as you go. Re-hoop over finished areas gently, and loosen the screw more than usual so you don’t crush your stitches.
If you plan to display the finished piece in the hoop, choose the size you want on your wall.
Wood, bamboo or plastic?
- Wooden hoops (beech): smooth, sturdy and good-looking. Beechwood hoops grip well and make the nicest frame for finished work.
- Bamboo hoops: lightweight and inexpensive. Many kits include one. They work well, but the screw hardware can be lighter, so check the grip.
- Plastic hoops: some have a lip or groove that grips fabric very tightly and they’re easy to wash. They’re less attractive for display.
- Spring hoops: a metal spring inside a plastic ring. Quick to change and popular for machine embroidery, but they hold less firmly for hand stitching.
For most beginners, a wooden or bamboo hoop is the best balance of grip, price and looks. Our beechwood embroidery hoop comes in 4, 5, 6, 7 and 8 inch sizes and doubles as a frame for finished work.
How to stop fabric from slipping
If your fabric keeps loosening no matter what:
- Bind the inner ring. Wrap cotton twill tape or a strip of bias tape around the inner ring, overlapping each turn, and stitch or glue the end. The extra texture grips the fabric much better. This is common for fine or slippery fabrics.
- Use a slightly smaller hoop. Small hoops hold tension more easily than large ones.
- Check the screw. If it’s stripped or the outer ring is warped, no amount of tightening will help.
How to avoid hoop marks
“Hoop burn” is the crease or ring left on the fabric after it has sat in a hoop for a long time. To keep it away:
- Take the fabric out of the hoop when you finish each session, especially if you won’t stitch again for days.
- Don’t clamp over finished stitches if you can avoid it. If you must, loosen the screw more than usual.
- Remove marks by rinsing gently in cool water or pressing from the back with a warm iron over a towel.
Finishing your embroidery in the hoop
A hoop makes a simple, charming frame:
- Put your finished piece back in the hoop, centered and tight, with the screw at the top.
- Trim the extra fabric to about 1 to 1.5 inches around the hoop.
- Gather the back: sew a running stitch around the edge of the leftover fabric and pull it tight, like a drawstring, then tie it off. Or fold the edges to the back and glue them to the inner ring.
- Cover the back with a circle of felt cut to the size of the inner ring, glued or stitched in place.
- Hang it from the screw with a ribbon or twine.
For the stitching itself, our how to embroider guide takes you from threading the needle to your first finished hoop.
Do you need a hoop at all?
For most hand embroidery, yes. A few exceptions:
- Punch needle always needs very tight fabric, so it uses a sturdy hoop or a gripper frame.
- Stiff fabrics like felt or canvas can often be stitched without a hoop.
- Some stitches, like long bullion knots, are easier with fabric held loosely in the hand.
Most of our beginner embroidery kits and all our punch needle kits include a hoop sized for the design. Check each product page for the size.
FAQ
What size embroidery hoop is best for beginners?
A 5 or 6 inch hoop is the most comfortable for a first project. It fits in your hand and holds a design you can finish in a few sittings.
How tight should fabric be in an embroidery hoop?
Drum-tight. When you tap it, it should sound like a drum and feel firm, with no ripples or sagging.
Which ring goes on top?
The outer ring, the one with the screw, goes on top. The fabric sits between the solid inner ring below and the outer ring above.
Can I leave my embroidery in the hoop?
For display, yes. While you’re still working, take it out between sessions so it doesn’t leave a permanent crease.
How do I measure an embroidery hoop?
Hoops are sized by the inner diameter of the ring. A 6 inch hoop holds a circle of fabric about 6 inches across.
Can I use an embroidery hoop as a frame?
Yes. Trim and gather the extra fabric on the back, add a felt backing, and hang the hoop by its screw.