
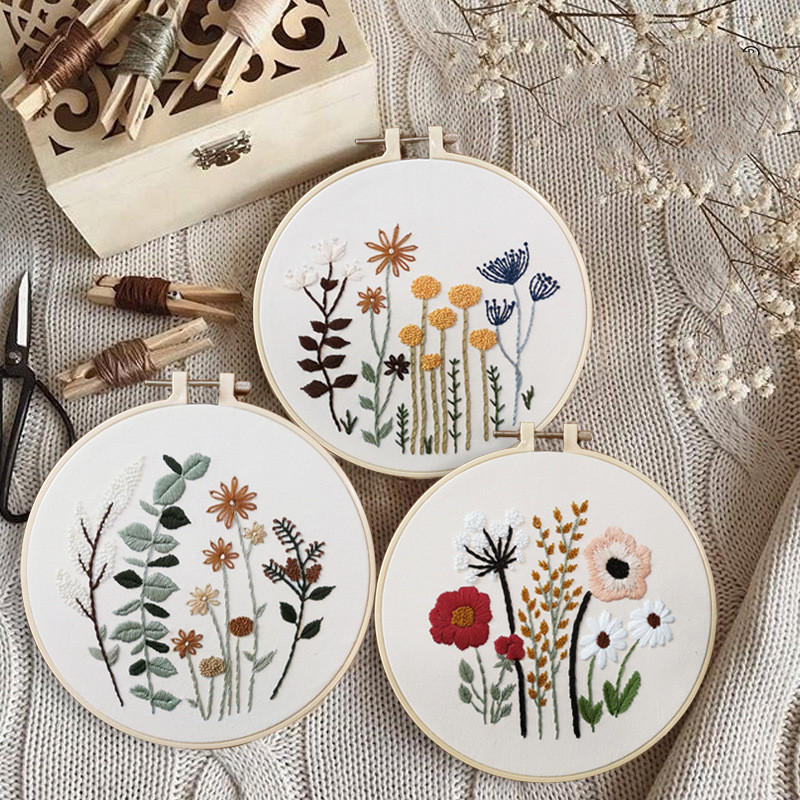
Hand embroidery is one of the easiest crafts to start. You need a hoop, some fabric, a needle and thread, and about an hour of quiet time. There is no machine to learn and no big investment. If you can sew on a button, you can learn how to embroider.
This guide walks you through everything, in order: what to buy, how to set up, how to make your first stitches, and how to finish a piece you’ll be happy to hang on the wall. Take it one step at a time. Wobbly stitches are part of learning, and they get neater faster than you think.
What you need to start embroidering
You only need five things. Everything else is nice to have.
- An embroidery hoop. Two rings that hold your fabric tight. A 6-inch hoop is a comfortable size for a first project, because it fits in your hand and gives you room to work.
- Fabric. Plain cotton or a cotton-linen blend is the friendliest. It’s firm enough to hold stitches but soft enough for the needle to pass through easily. Avoid stretchy fabric (like T-shirt jersey) for your first project.
- Embroidery floss. Stranded cotton floss is the standard. Each piece is made of six thin strands twisted together, and you can split them to make thinner or thicker lines.
- Embroidery needles. Look for “embroidery” or “crewel” needles. They have a sharp point and a long eye, which makes threading several strands much easier.
- Small, sharp scissors. Any small scissors work, but embroidery scissors with a fine tip let you snip close to the fabric.
Nice-to-haves: a needle threader, a water-soluble fabric pen or transfer paper for drawing designs, and a floss organizer once your collection grows.
Kit or separate supplies?
For a very first project, a kit saves you a lot of guessing. The design is already printed on the fabric, the floss colors are chosen for you, and the hoop fits the design. You get to focus on learning stitches instead of shopping. Our beginner embroidery kits are built this way: pre-printed fabric, sorted floss, needles and a hoop in one box.
If you already know you want to stitch your own designs, start with a good hoop and a wide range of floss colors instead, then add fabric and a pattern of your choice. Our floss set comes in 50 or 200 colors, one skein per color.
Step 1: Put your fabric in the hoop
A tight hoop is the secret to neat stitches. Loose fabric puckers and makes your stitches uneven. (Not sure which size to get? See how to use an embroidery hoop.)
- Loosen the screw on the outer ring and separate the two rings.
- Lay the inner ring on a table. Place your fabric on top, design facing up and centered.
- Press the outer ring down over the fabric and inner ring.
- Gently pull the fabric edges all around, a little at a time, until the surface feels firm like a drum.
- Tighten the screw. Tap the fabric: it should make a soft “thump,” not ripple.
Keep the screw at the top (at “12 o’clock”) if you’re right-handed, so your thread doesn’t catch on it while you work. Left-handed stitchers may prefer it slightly to the side.
Step 2: Prepare and thread your floss
Cut a comfortable length
Cut a piece of floss about 18 inches long, roughly the distance from your fingertips to your elbow. Longer pieces tangle and wear thin as they pass through the fabric again and again. Our embroidery floss guide covers strands and colors in more detail.
Separate the strands
Most beginner patterns ask for two or three strands. To separate them, hold the cut floss at one end, pinch a single strand and pull it straight up slowly. The rest of the floss will bunch up and then relax. Repeat for each strand you need, then lay them back together. Separating strands one at a time and recombining them helps the thread lie smooth and flat.
- 1 strand: very fine details and lettering
- 2 strands: fine outlines and small details
- 3 strands: the everyday choice for most beginner designs
- 6 strands: bold, chunky lines
Thread the needle
Trim the end at a sharp angle, flatten it between your lips or fingers, and push it through the eye. If it won’t cooperate, a needle threader does the job in seconds.
Step 3: Start your thread
There are two simple ways to start.
The knot method. Tie a small knot at the end of your thread. Bring the needle up from the back of the fabric so the knot stays behind. It’s quick and perfectly fine for pieces that will hang on a wall.
The waste knot method. Tie a knot and go down through the front of the fabric a few inches away from where you’ll stitch, in the direction you’re heading. Stitch toward the knot so your stitches cover the thread on the back. When you reach it, snip the knot off. This gives a flatter back, which is nice for clothing or pieces you’ll frame.
Step 4: Learn three starter stitches
You don’t need to know dozens of stitches to finish a beautiful piece. These three will carry you through your first project.
Running stitch
Bring the needle up, go down a short distance ahead, come up again a little further along, and repeat. It makes a dashed line. It’s the easiest stitch there is, and it’s great for practicing even spacing.
Back stitch
Come up one stitch length ahead of where you want the line to start. Go down at the start point (backward), then come up one stitch length ahead of your last stitch. Go back down into the end of the previous stitch. The result is a solid, clean line, which is perfect for outlines, stems and lettering.
Satin stitch
Satin stitch fills a shape with smooth, parallel stitches laid side by side. Bring the needle up at one edge of the shape, go down on the opposite edge, and come up right next to where you started. Keep the stitches close together and all at the same angle. Start in the middle of a shape and work out to each side; it keeps your angle consistent.
When you’re ready for more, our guide to embroidery stitches for beginners covers the eight basic stitches step by step.
Step 5: Follow your pattern
With a printed kit, you simply stitch over the lines. A few habits make it easier:
- Work outlines before fills, unless your pattern says otherwise. It gives your satin stitch a clear edge to aim for.
- Stitch one color at a time. Finish every area of one color before switching, and carry the thread on the back only for short distances (under about an inch). Longer jumps can show through light fabric.
- Cover the printed lines fully. Stitch right on top of the line or just outside it, so no ink peeks out.
- Keep an even tension. Pull until the thread lies flat on the fabric, then stop. If the fabric puckers around a stitch, you’re pulling too hard.
How to keep your thread from twisting
As you stitch, the floss slowly twists. Every few stitches, let the needle dangle from the fabric and spin free. That untwists it and prevents knots.
Step 6: End your thread
When you have about 4 inches of thread left, or you’re changing color, it’s time to end.
- Take the needle to the back of the fabric.
- Slide it under three or four stitches on the back.
- Pull through, and repeat once more in the opposite direction if you like.
- Trim the tail close.
You can also tie a small knot on the back, but weaving under stitches gives a tidier, flatter result.
Step 7: Finish and display your embroidery
Once the last stitch is in, you’re almost done.
- Remove leftover marks. If you drew your design with a water-soluble pen, a light spritz or gentle rinse in cool water will remove it. Always check your kit’s instructions first; printed lines on kits are meant to be covered by stitches.
- Press gently if needed. Lay the piece face down on a towel and press with a warm iron on the back. The towel protects your stitches from being flattened.
- Frame it in the hoop. Put the finished piece back in the hoop, tighten, and trim the extra fabric to about 1 to 1.5 inches around the hoop. Run a line of running stitch around the edge of that extra fabric, pull it tight to gather it on the back, and tie off. Some stitchers glue a felt circle on the back for a clean finish.
A beechwood or bamboo hoop makes a lovely, simple frame. If you’d like a hoop that looks good on the wall, our beechwood embroidery hoop comes in sizes from 4 to 8 inches.
Common beginner mistakes (and easy fixes)
- Puckered fabric: the hoop was too loose or the thread was pulled too tight. Re-tighten the hoop and relax your pull.
- Tangled thread and knots: the piece of floss is too long. Stick to about 18 inches and let the needle spin free every so often.
- Gaps in satin stitch: stitches are too far apart. Place each new stitch right against the last one.
- Messy back: long jumps between areas. End your thread and restart rather than carrying it far.
- Uneven stitch lengths: go slower on the first few inches. Consistency comes with practice, not with special tools.
Your first project: keep it small
Pick a design around 5 to 6 inches with a few colors and simple shapes, like a small flower or leaves. You’ll finish it in a few sittings, and finishing is what builds confidence. If you want to try more than one craft before choosing, our kit sets bundle three or four designs in one box, so you can move on to the next one as soon as you finish.
FAQ
Is embroidery hard to learn?
No. Most people can learn running stitch and back stitch in their first sitting. Like handwriting, your stitches get neater with practice, but you can finish a nice-looking first piece right away.
How long does a first embroidery project take?
A small beginner design of around 6 inches usually takes a few relaxed sessions, often a weekend. Designs with a lot of satin stitch fill take longer than outline-only designs.
How many strands of floss should I use?
Follow your pattern if it says. If not, three strands is a good all-round choice, two for fine details, and six for bold lines.
Do I need to knot my thread?
A small knot is fine for most wall pieces. For clothing or anything that gets touched a lot, weaving the tail under stitches on the back gives a flatter, more durable finish.
What fabric is best for beginners?
A medium-weight cotton or cotton-linen blend. It’s stable, easy to hoop and forgiving. Avoid stretchy or very sheer fabric until you’re comfortable.
Can I wash my embroidery?
Usually yes, gently, by hand in cool water. Don’t wring it; roll it in a towel to remove water and let it dry flat. Check your floss and fabric care information first.