
Here is how to wash embroidery safely: first find out how the design was marked, because that decides how the lines come out. Then hand-wash gently in cool water with mild soap, blot it in a towel, dry it flat and iron it face down. Always follow your kit’s instructions and test on a scrap or hidden corner first.
Not every piece needs a full wash. If there are no pattern lines and the fabric is clean, a gentle press may be all you need.
First, identify how your design was marked
Different marking methods behave differently in water and under an iron. Getting this wrong can set a mark permanently, so check before you rinse.
| Marking type | How to remove it | Watch out for |
|---|---|---|
| Water-soluble printed fabric or film | Rinse or dab with cool to lukewarm water until the lines disappear | Do not iron before the lines are gone, as heat can set some marks |
| Water-soluble or air-erasable pen | Dab with a damp cloth or rinse; air-erasable ink may fade by itself | Follow the pen’s instructions, and test first |
| Heat-erasable pen | The manufacturer’s method, usually heat from an iron | Marks can return in the cold, and some leave faint lines on dark fabric |
| Pencil or chalk | Brush off, or rinse lightly | Rubbing can smudge the fabric |
| Permanent marker, ballpoint or iron-on transfer | Usually does not come out; cover it with your stitches | Never try harsh solvents on embroidery |
Kit listings tell you what to expect. The print on our Aurora and Starry Night kit is water-soluble, so any lines left showing rinse out. The Celestial Sun and Moon kit lists a water-resistant print that rinses out. For any other kit, read the instruction sheet.
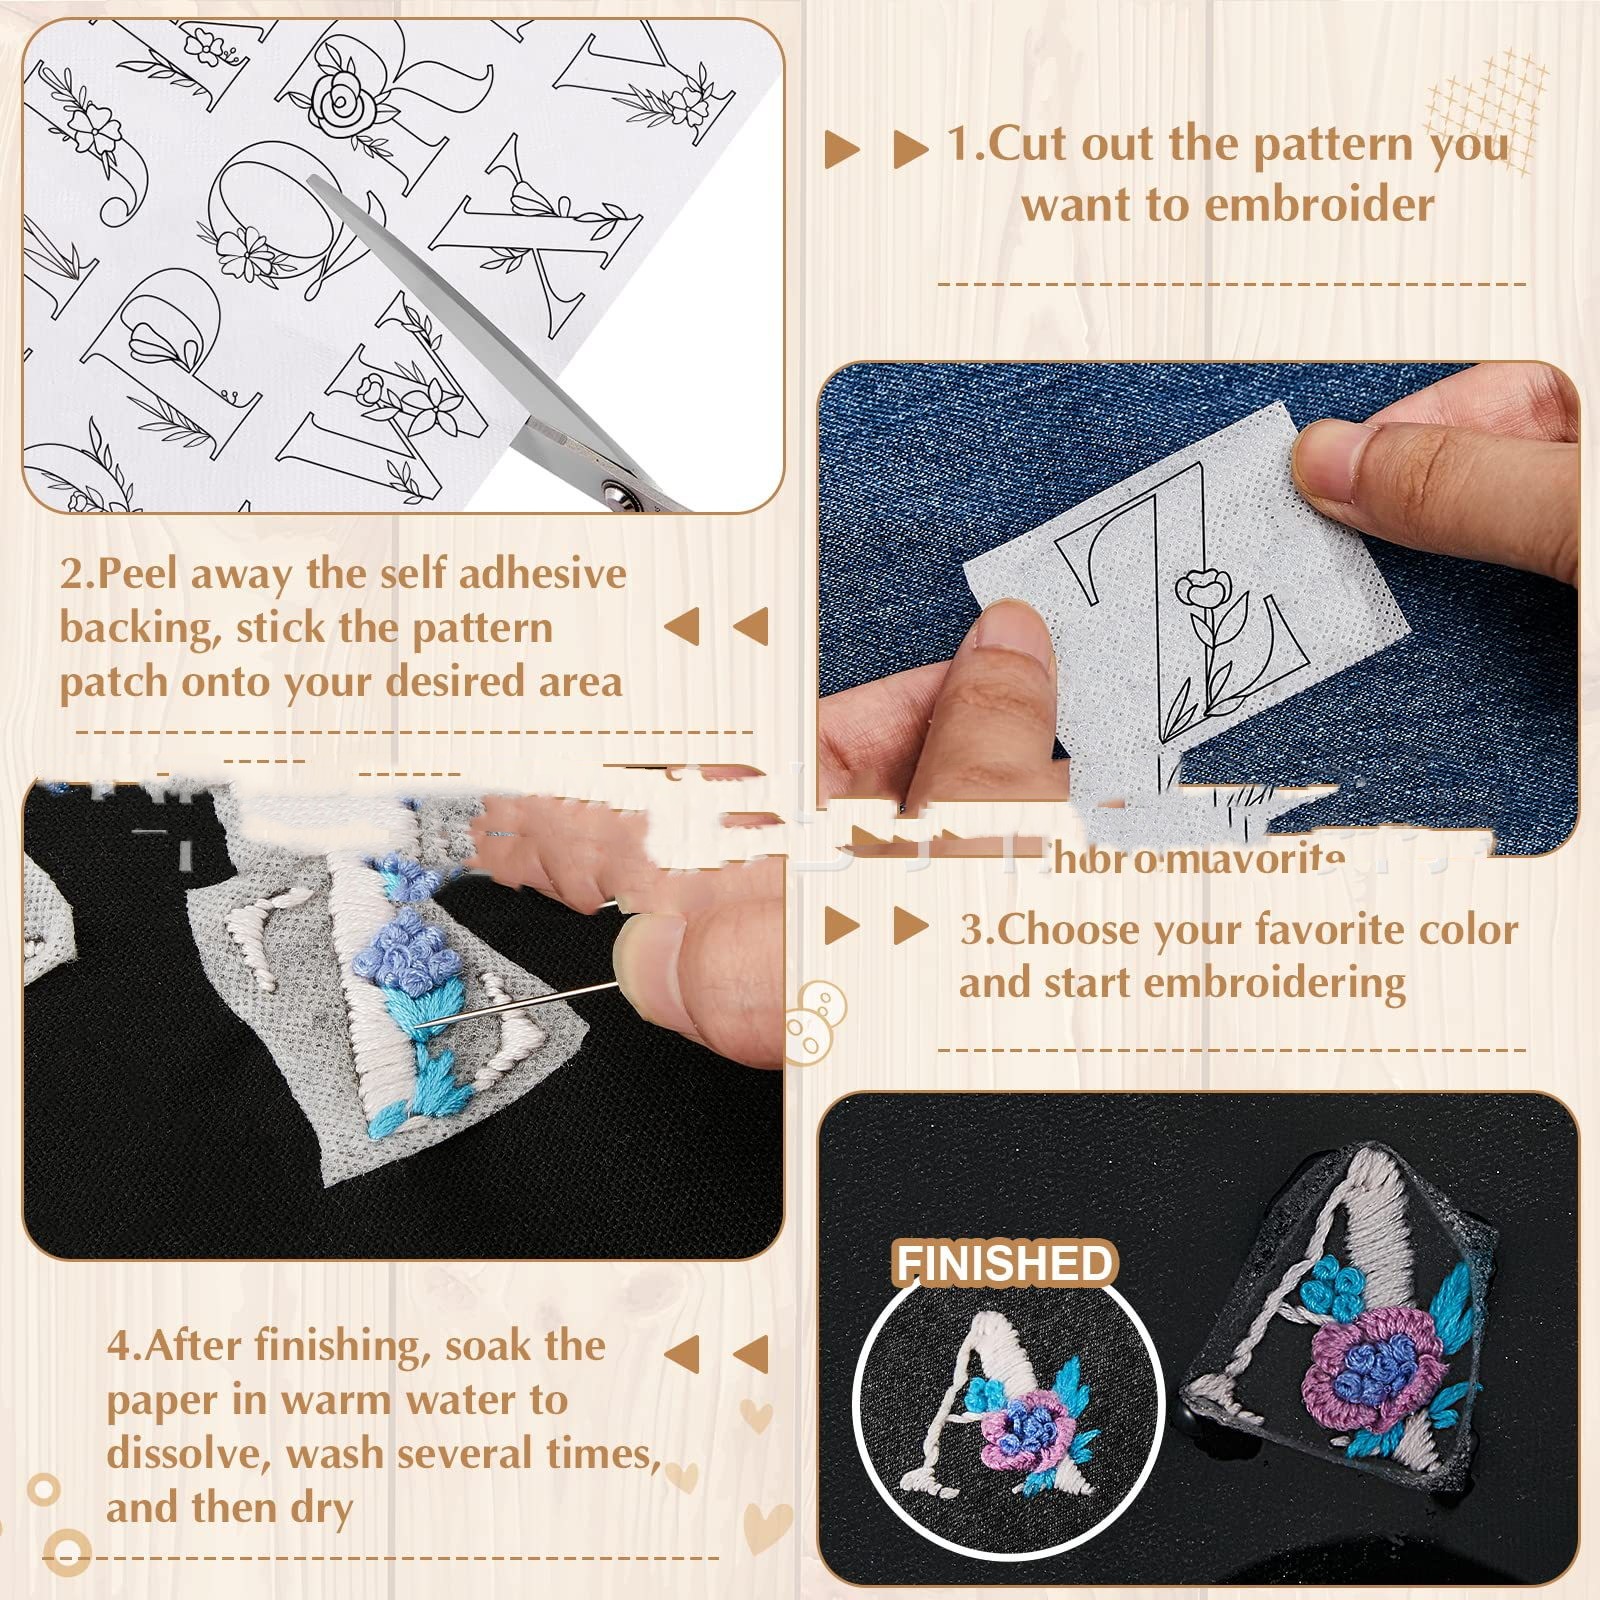
Stick-and-Stitch patterns work differently: you stitch right through the printed sheet, then rinse it away in warm water. For more on transfer methods, see our guide to transferring embroidery patterns.
If you cannot tell how your design was marked, do not wash it yet. Test a hidden corner or ask the seller.
Test before you wash
- Test the marking removal on the edge of the fabric, or on a scrap if you have one.
- Test the floss for colorfastness. Dab a damp white cloth on a hidden stitch and check whether any color transfers. Dark reds, blues and blacks are the usual suspects.
- If color bleeds, do not soak the piece. Spot-clean instead, or leave the lines in the fabric as they are.
How to wash embroidery by hand
- Remove the piece from the hoop. Hoop marks fade more easily once the fabric is relaxed.
- Fill a clean basin with cool to lukewarm water and add a few drops of mild, clear detergent.
- Lay the embroidery in the water and swish gently for a few minutes. Do not scrub, rub or wring the stitches.
- Rinse in fresh cool water until no soap remains and the pattern lines have gone. Repeat if some lines are still visible.
- Lay the piece on a clean white towel and roll it up to press out the water. Do not twist.
- Reshape it and lay it flat to dry, away from direct sun and heat.
Hand-washing is the safest choice. If you want to use a machine, choose a mesh bag and a gentle cold cycle, and only if the floss passed the colorfastness test and the marking type allows it.
How to iron finished embroidery
- Wait until the lines are fully removed. Then iron while the fabric is still slightly damp, which helps wrinkles release.
- Fold a thick towel on your ironing board and lay the embroidery face down on it. The stitches will sink into the towel instead of flattening.
- Cover the back with a thin cotton pressing cloth. Set the iron to suit the fabric, starting low, and check the fabric’s care label if you have one.
- Press by lifting and lowering the iron rather than sliding it. Avoid pressing directly on the front of French knots and other raised stitches.
- Let the piece cool completely before you put it back in the hoop.
Special cases
- Dark fabric: rinse more than once so chalk or pen residue does not dry as a pale haze.
- Embroidery on clothing or bags: finish the stitching, remove the pattern as directed, then launder by the item’s care label.
- Vintage or delicate pieces: skip the wash and consult a textile conservator.
After washing: finishing your piece
Once dry and pressed, it is ready to finish. Our guide on how to finish an embroidery hoop shows how to back, hang or frame it. For floss details, see the embroidery floss guide, and for hoops, how to use an embroidery hoop. Need supplies? Browse embroidery supplies.
FAQ
Do I have to wash embroidery?
No. If there are no pattern lines to remove and the fabric is clean, a gentle press is enough.
Can I put embroidery in the washing machine?
Hand-washing is safer. If you use a machine, put the piece in a mesh bag on a gentle, cold cycle, and only after testing the floss for colorfastness.
Will heat-erasable pen lines come back?
They can. Cold temperatures may bring the marks back, so keep this in mind if the piece will hang somewhere cold. Test the pen on scrap fabric before you use it.
What if the pattern lines will not come out?
Rinse again in clean cool water, and confirm which marking type you have. Avoid bleach and solvents, since they can damage floss and fabric.
How do I dry embroidery?
Blot it in a towel and lay it flat, away from direct heat and sun. Iron it face down once it is nearly dry.