
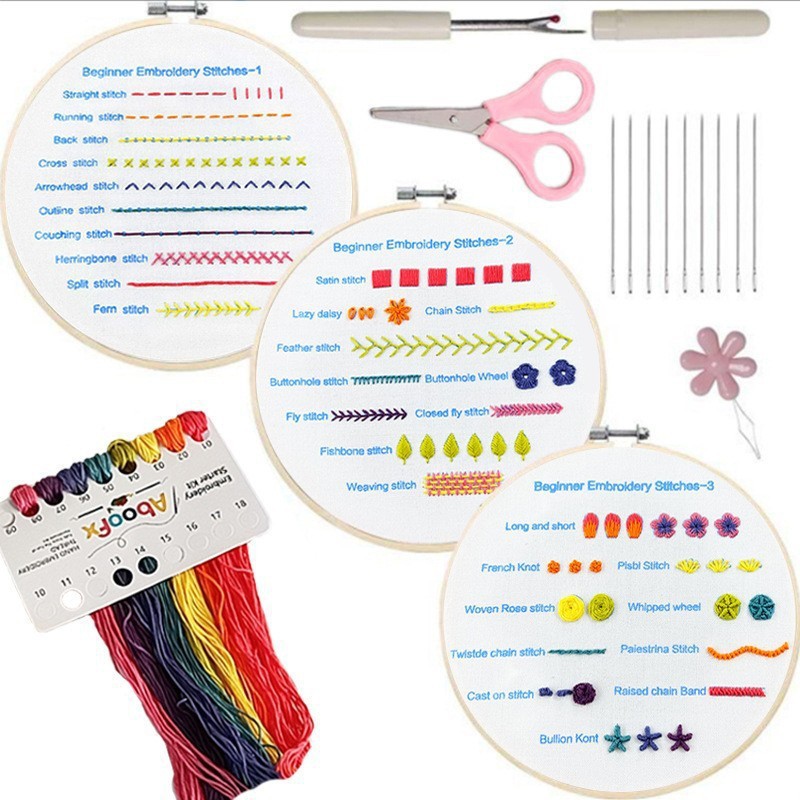
Satin stitch fills a shape with straight stitches laid side by side so no fabric shows between them. Bring the needle up on one edge of the shape, take it down on the opposite edge, and repeat with each stitch touching the last. Keep the stitches parallel and the tension even, and you get a smooth, glossy fill.
It looks simple, but satin stitch shows every mistake. This guide covers the steps, how many strands to use, when to pad, and how to fix gaps and ragged edges.
When to use satin stitch
Satin stitch suits small to medium shapes: petals, leaves, berries, letters, hearts and animal bodies. It gives solid color with a sheen that catches the light.
It is not good for large areas. Long stitches snag, sag and loosen. For wide shapes, use long and short stitch instead, or split the shape into smaller sections.
Many of our kits use it. For example, the Mushroom Embroidery Kit for Beginners and the Celestial Sun & Moon Embroidery Kit for Beginners both list satin stitch among their stitches.
What you need
- Fabric in a hoop, pulled taut but not stretched out of shape (see how to use an embroidery hoop)
- Embroidery floss, usually 2 or 3 strands
- A sharp needle with a comfortable eye
- A traced outline of the shape
How to do a satin stitch step by step
- Start with a clear outline. If your pattern is printed, use it. If not, trace the shape with a water-soluble pen.
- Outline the shape with a small back stitch or split stitch. This is optional but gives a crisp edge and slight padding. Stitch just inside the line.
- Thread the needle with 2 or 3 strands. Separate the strands, then put them back together so they lie flat and parallel.
- Bring the needle up at the outer edge of the shape, at the widest point or the center.
- Take the needle down at the opposite edge, directly across. Pull the thread through so it lies flat without denting the fabric.
- Bring the needle up right beside the first stitch, just next to where you started. Go down on the opposite edge beside the first exit point.
- Repeat, placing each stitch snug against the last. Work from the center out to one side, then return to the center and work the other side.
- Fasten off on the back by weaving the tail under a few stitches.
How many strands should you use?
For small shapes, 2 strands is easiest to control. For medium shapes and bolder color, 3 strands gives good coverage. More than 3 strands tends to look bulky and can twist.
Using fewer strands gives a finer, smoother surface but takes more stitches. Using more covers faster but shows gaps more. The embroidery floss guide explains how to separate and recombine strands for a flat lay.
| Shape size | Strands | Notes |
|---|---|---|
| Tiny (seed, small petal) | 1 or 2 | Stitch straight across, keep short |
| Small to medium (leaf, heart) | 2 or 3 | Pad edge with split or back stitch |
| Wide (over about half an inch) | Use long and short stitch | Long satin stitches loosen and snag |
Keeping stitches at the right angle
Stitch direction changes how the fill looks. On a leaf, work at a slight slant from the center vein to each edge. On a circle, keep every stitch parallel to a line through the middle, or start at the center and work outward.
Choose an angle at the start and keep it. Switching mid-shape creates lines where the light reflects differently.
Common satin stitch mistakes and fixes
Gaps between stitches
Gaps mean the stitches are not snug or the thread is too thin for the area. Place each stitch right against the last. If gaps still show, use one more strand or add a padding layer under the fill.
Ragged, wobbly edges
Stitching outside the outline or inconsistent entry points cause this. Outline the shape first with back stitch or split stitch, and enter and exit at that edge every time. Use a sharp needle so the thread does not split.
Puckering
Fabric that puckers usually has stitches pulled too tight, or the hoop was too loose. Pull the thread until it lies flat without dimpling the fabric. Keep the hoop taut and re-tighten as you work.
Loose, floppy stitches on long shapes
Stitches longer than about half an inch tend to loosen. Break the shape into two sections with a small gap, or switch to long and short stitch.
Twisted thread
Twisting makes the fill look rough. Let the needle dangle every few stitches so the floss untwists. Lay the strands flat as you pull each stitch through.
Practice with a sampler
Draw a few leaf and heart shapes on scrap fabric and fill them. Compare gaps and edges, and adjust strand count until it looks smooth. If you want a printed guide, the Stitch Sampler Embroidery Kit includes satin stitch with the name printed beside the row, and the Embroidery Stitch Sampler Set of 4 adds even more practice fabrics.
Satin stitch pairs well with French knots in flower designs. If you have not tried them, read how to do a French knot first. Then see embroidery stitches for beginners for other stitches to try next.
FAQ
Is satin stitch hard for beginners?
It is easy to learn but takes practice to make neat. Start with small shapes and outline them first.
How do I stop satin stitch from puckering?
Keep the fabric drum-tight in the hoop and pull each stitch just until it lies flat. Do not yank.
What is the difference between satin stitch and long and short stitch?
Satin stitch uses stitches of equal length spanning the whole shape. Long and short stitch uses staggered stitch lengths, so it handles bigger areas and color blending.
Should I pad satin stitch?
Padding is optional. A back or split stitch outline under the fill makes the edge crisper and slightly raised.