
In the stem stitch vs back stitch question, back stitch makes a crisp, solid line and is the easiest to learn. Stem stitch makes a slightly twisted, rope-like line and follows curves smoothly. Split stitch makes a fine, braided line that looks like tiny chain links and works well for lettering and detail.
All three make outlines, and all three are worked with 1 to 3 strands of floss. The right choice depends on the shape of the line and the look you want. This guide compares them side by side, with steps and tips for each.
Back stitch vs stem stitch vs split stitch at a glance
| Back stitch | Stem stitch | Split stitch | |
|---|---|---|---|
| Look | Clean, solid line of even dashes joined end to end | Slightly raised, twisted rope | Fine, braided line |
| Best for | Straight lines, small details, letters | Curves, vines, flower stems | Curved letters, fine outlines, filling edges |
| Difficulty | Easiest | Easy | Medium |
| Strands | 1 to 3 | 2 or 3 | 2 or more (it needs at least 2 to split) |
| Watch for | Gaps or uneven stitch length | Thread on the wrong side | Splitting the wrong strands |
| Thread used | Uses more thread on the back | Moderate | Moderate |
How to do back stitch
- Bring the needle up one stitch length ahead of where the line starts.
- Take the needle down at the start of the line, working backward. Pull the thread through.
- Bring the needle up one stitch length beyond your first exit point.
- Take the needle down into the end of the previous stitch, in the same hole.
- Repeat: come up ahead, go down in the hole where the last stitch ended.
Keep every stitch the same length, about 1/8 inch for most designs. Shorter stitches follow curves better.
How to do stem stitch
- Bring the needle up at the start of the line.
- Take a stitch forward along the line and go down. This is your first stitch.
- Bring the needle up halfway back along that first stitch, slightly to one side of the line.
- Take another stitch forward, the same length as the first, and go down.
- Repeat, always keeping the working thread on the same side of the needle.
Keeping the thread on one side is the trick. If the thread crosses to the other side, the line switches look and turns flat and uneven. On curves, keep the thread on the outside of the curve for a smoother line.
How to do split stitch
- Use at least 2 strands. Bring the needle up at the start of the line.
- Take a stitch forward and go down.
- Bring the needle up through the middle of that first stitch, splitting the strands with the needle tip.
- Take another stitch forward and go down.
- Repeat, coming up through the center of each stitch.
Use a sharp needle and stitches of about 1/8 inch. Split the floss cleanly so you do not catch the fabric.
Which outline stitch should you choose?
For straight lines and details
Use back stitch. It is simple and precise, and it shows shapes clearly. It is the usual choice for outlining shapes before filling them.
For stems, vines and curves
Use stem stitch. It bends around curves without kinks and gives a slightly raised, natural look. Wildflower designs are a good example. The Wildflower Line-Art Embroidery Kit for Beginners lists both back stitch and stem stitch.
For lettering
Both back stitch and split stitch work. Back stitch is easier and clear. Split stitch looks smoother and more like handwriting. Our Funny Embroidery Kit for Adults notes that the lettering is worked in back stitch or split stitch.
For fine detail and thin lines
Split stitch with 2 strands gives a delicate line. Back stitch with 1 strand also works well for whiskers, tentacles and small details.
Common mistakes and fixes
Uneven stitch length
Mark the pattern lightly or count fabric threads if your fabric has a visible weave. Slow down and place each stitch by eye against the last.
Gaps in back stitch
The needle should go back down in the same hole where the last stitch ended. Entering short leaves a gap, so aim for the previous end point.
Stem stitch looks flat or lumpy
The thread has crossed to the other side. Keep it on one side throughout, and keep the stitches the same length.
Split stitch catches the fabric
Aim the needle between the strands of the previous stitch, not into the fabric. A sharp needle and a gentle angle help. Check the embroidery needle sizes guide if your needle is too blunt.
Practice all three
Draw a wavy line on scrap fabric and stitch it three ways, one under another. Compare how each follows the curve. That is the fastest way to learn which you like.
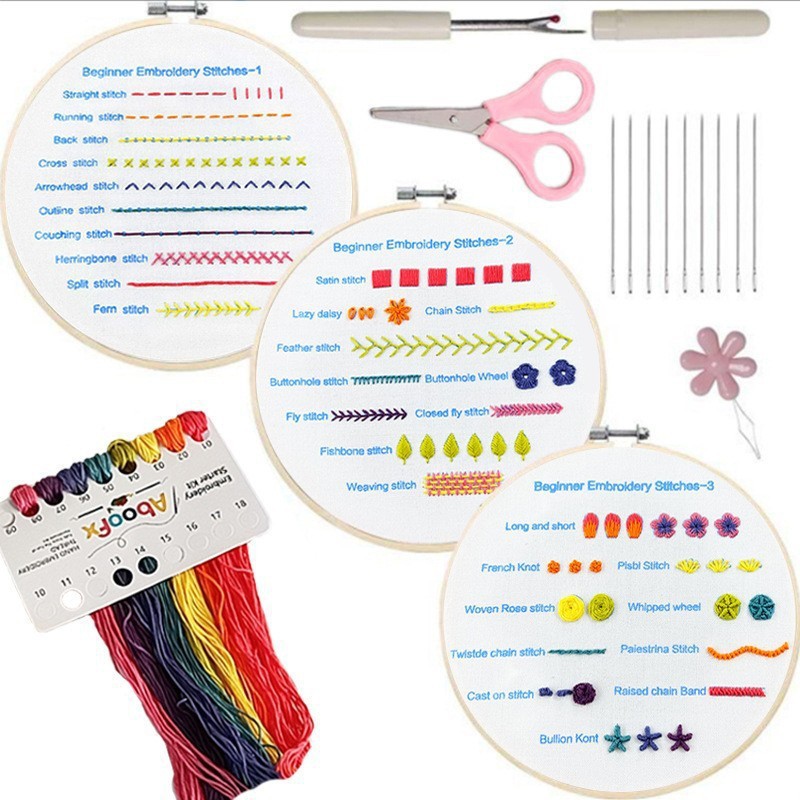
A practice sheet makes it easier. The Stitch Sampler Embroidery Kit prints each stitch name beside its row, and the Embroidery Stitch Sampler Set of 4 lists back, stem and split stitches among its 30+ stitches. You can browse all stitch sampler kits too.
For other stitches, see embroidery stitches for beginners. If you are new to filling shapes, try how to do a satin stitch next, or learn how to do a French knot for flower centers.
FAQ
Is stem stitch the same as outline stitch?
They are very close. Both use overlapping stitches, but the thread position differs. Outline stitch keeps the thread on the opposite side, so the line turns out slightly different.
Which is the easiest outline stitch for beginners?
Back stitch. It has the simplest steps and gives a clear result.
Can I use one strand for these stitches?
Back stitch and stem stitch work with 1 strand. Split stitch needs at least 2 strands so the needle has something to split.
How long should the stitches be?
About 1/8 inch is a good starting point. Use shorter stitches on tight curves and longer ones on gentle lines.