
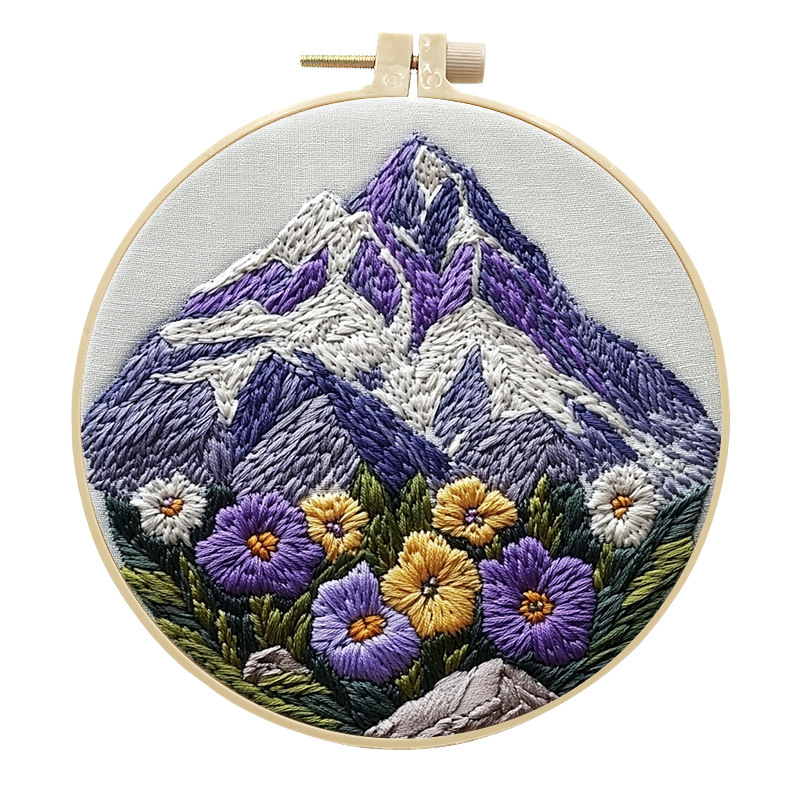
Mountain embroidery is easiest when you treat a landscape as layers: sky first, far peaks next, then closer slopes and the meadow. Use long and short stitch for the mountains, satin stitch for small shapes, and French knots and lazy daisies for flowers. Work from the back of the scene to the front, and your stitches will overlap the way real hills do.
Why landscapes suit beginners
A landscape has no faces and no perfect symmetry, so small wobbles look like natural texture. Slopes, sky and grass are also forgiving places to practice blending, which is the skill that makes embroidery look painted rather than flat.
The catch is color. Mountain designs use several shades of the same color, so it helps to slow down and keep your floss organized. If you are still choosing a first project, our guide to the best embroidery kits for adults explains how to match a kit to your skill level.
The stitches you need
- Long and short stitch: fills the mountains and lets one shade blend into the next.
- Satin stitch: smooth fills for small shapes such as petals, a sun or a moon.
- French knots: dots of texture for flower heads in a meadow.
- Lazy daisy: quick petals and leaves for wildflowers.
- Back stitch or split stitch: a clean outline where a ridge needs a sharp edge.
If any of these are new, practice them first on scrap fabric using our embroidery stitches for beginners guide.
How to embroider a mountain, step by step
- Hoop the fabric drum-tight. Loose fabric puckers under long and short stitch. Our guide to using an embroidery hoop shows how to tighten it evenly.
- Start with the sky or the farthest mountain. Anything that sits behind another shape goes in first.
- Outline the ridge line with a row of small split stitches. This gives the fill a firm edge to build against.
- Fill the first color band with long and short stitch. Make the first row of stitches alternate long and short, then keep later rows uneven so the color can blend.
- Angle your stitches to follow the slope. Stitches that run along the mountain’s shape read as rock; stitches that all run straight up and down read as stripes.
- Add the next shade by pushing its stitches between the ends of the row above. Overlapping the ends by a few stitches is what hides the join.
- Stitch the snow and highlights last. Use the lightest shade on the sunny side of each peak and keep those stitches short.
- Finish with the foreground: meadow flowers in French knots and lazy daisies, placed in loose clusters rather than in rows.
Shading tips for snowy peaks
Pick the direction of the light first, then stay with it. If the light comes from the left, the left slope gets your lightest shades and the right slope gets the darkest.
Use two or three strands of six-strand floss for blending. Fewer strands give softer transitions, and our embroidery floss guide explains how to separate and combine strands without tangles.
Step back from the hoop now and then. Shading that looks patchy up close often blends fine at arm’s length.
Mountain kits from Shop Tattitude
The Mountain & Wildflowers Embroidery Kit for Beginners is a snowy-peak scene with a wildflower meadow in front. It comes with printed fabric, floss, a 6-inch (15 cm) imitation-bamboo hoop, a needle and a seam ripper. It uses long and short stitch, satin stitch, French knots and lazy daisy, and the supplier rates it advanced beginner because of the shading on the peaks.
If you want the whole series, the Mountain & Wildflowers Kit Set of 4 has four designs: Alpine Blooms, Violet Peak, Night Mountain and Sky Blue Peak. It has one hoop, a needle and a seam ripper, and you reuse the hoop for each design.
For a night landscape, the Aurora & Starry Night Embroidery Kit has the northern lights over a lake, a starlit meadow and a sunset forest in a 6-inch bamboo hoop. It is also rated advanced beginner.
Browse every design in our beginner embroidery kits collection. When you are done stitching, see how to finish an embroidery hoop so the back looks as tidy as the front.
FAQ
Is mountain embroidery hard for beginners?
It is manageable if you know back stitch and satin stitch and are willing to learn long and short stitch. The shading takes patience more than skill. Our how long does embroidery take post gives realistic expectations for project time.
Which stitch is best for mountains?
Long and short stitch, because it blends colors without visible lines. Satin stitch works for small shapes, but on a large slope it can look stiff.
What order should I stitch a landscape in?
Back to front: sky, far mountains, near mountains, then meadow and flowers. Shapes in front then cover the edges of the shapes behind them.
Do I need to draw the design myself?
No. Our kits have the design pre-printed on the fabric. If you want to use your own drawing, see how to transfer embroidery patterns.